Yosemite has many hikes that you can do. The most famous are El Cap and Half Dome, but you can also find less-popular trails. These trails can be difficult, but they are some of the best. You can go as far as you like, depending on your level of skill. Yosemite has shorter trails that are suitable for people with limited time.
You can try the Four Mile Trail if you're looking to do a more challenging hike. Starting near the bottom of Sentinel Rock, the Four Mile Trail ascends 3,200 feet to Glacier Point. Although it now extends to just over five miles, the original toll train route still affords breathtaking views of Yosemite Falls. You can also make a side trip up to Union Point for a stunning view of the valley below.
The Valley Trail is the most well-known trail in Yosemite. It begins on the valley floor. It climbs up to a viewpoint at an elevated vantage point, climbing over 1,000 feet. The views from this trail are breathtaking, including those of El Capitan and Half Dome. Yosemite's beautiful scenery is what makes it a popular destination. You can also enjoy many other hikes within the park.
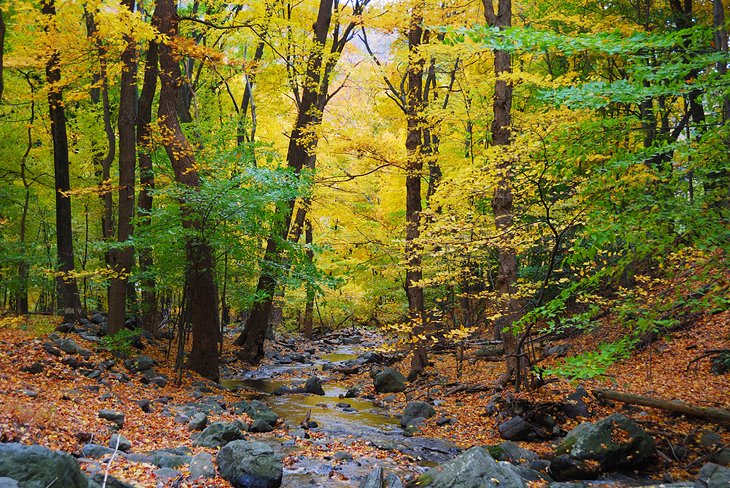
The Cathedral Lakes Hike is a great choice for a day in Yosemite National Park. The hike is easy and takes between three and five hours. The trail winds through marshy and moosy areas to reach the Cathedral Lake picnic area. You can enjoy the views and rest once you've completed the hike. If you have more energy and the time to climb, you can go on a different trail.
You can find a Yosemite hike trail, or a day hike on the park's scenic trails. There are many trails to choose from so you will be able to find the one that best suits your needs. You'll soon discover the amazing beauty of the park if you hike as much as you can. It will be a great decision.
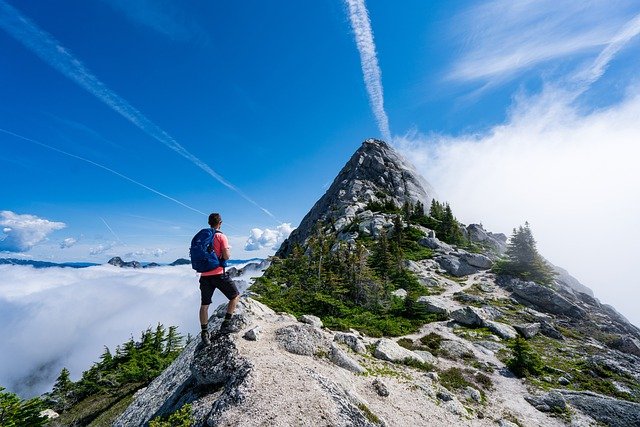
Mount Hoffman Hike. Half Dome is only accessible after the snow has melted. Panorama views of Yosemite Valley, the Sierras and beyond will be available on this trail. It takes between six and ten hours to complete the hike. It's also a good choice if time is tight. Yosemite also has other incredible hikes that will make you feel awestruck.
Sentinel Dome. The hike is 2.2 miles round trip and offers breathtaking views of Yosemite Valley. It's also much shorter than other Yosemite hikes, giving you more time to explore the park. People who don't have the time or desire to hike long distances may opt to follow a shorter trail like the Mist Trail.
FAQ
How do you doomsday prep with a budget?
It can be hard to prepare your home for the apocalypse. If you do have to prepare, here are three ways you can make sure you're prepared.
-
It is important to ensure that you have enough water as well as food. Do not be caught without supplies in the event of a disaster.
-
A solar-powered radio is a great option. If there's a power outage, this device will keep you informed about what's going on around the world.
-
Learn how you can grow your own food. You will be able to determine exactly what you eat. You won't worry about running out of food.
What do I need to know before starting my doomsday prep?
First, you will need to collect information about your region. What natural disasters could you expect to happen in your locality? Are there any serious risks?
Flood insurance policies are a good idea if you live in a flood area. Flooding is one of the biggest threats to life during a crisis.
Insurance for tsunamis is a good idea if you live on the coasts. Underwater earthquakes cause tsunamis. They are often unpredictable so it is important to be prepared.
Next, decide how long do you want to be independent. What length of time will you be able fend for your self?
Will you be absent for a few short days? Or will you be away for several weeks or months?
Will you be living alone? If so, you might want to add a weapon. You can choose between a gun and a bow-and-arrow. You should be comfortable with the tool you choose.
Other than weapons, tools like a shovel or axe, saw and hammer, nails, rope and other items are important. These tools could be used to build shelters or make your own weapons.
Additionally, you will likely need to stock up on food and water. Make sure you have enough food for several days.
Don't forget that you don’t have to buy all the items on this list. You should start at least.
How can I get started with survival prep?
Start with an emergency kit. Start with a basic kit that includes food, water and shelter. Then add items that help you stay safe and secure.
Consider adding a solar powered radio, flashlight, whistle, compass, whistle and map. You might also consider fishing equipment if your home is near rivers, lakes, and streams.
A bug-out kit (BOO) can be a great way of preparing for an emergency. This backpack is filled with essential gear. Some BOOs are equipped with a tent, sleeping bags or firestarter, a stove, pot, cookware, battery, flashlights and first aid kits.
There are many options for disaster preparation. Start with these basics and expand your list based on your own situation.
What every doomsday apologist should know?
Not only what you need, but also the amount of it. You must learn to live off of the land if you want your survival for long periods.
There are many ways to prepare for an emergency. This list does not necessarily mean that you should go out and purchase everything. You must at least be able to identify where to begin when planning for disaster.
The most important thing you can do is make sure that you are prepared for any eventuality. If you are serious about surviving, you must be ready for anything.
What medical supplies should you keep in your stockpile?
If you're going to be in an emergency situation and have to take over medicine, make sure you have enough for at most three months. Stocking up on all kinds of medication, such as pain relievers, antibiotics, and cold medicines, is the best way to do so. You might also consider storing food. If you don't have fresh food on hand, it will take you longer to prepare them.
Statistics
- Approximately a hundred and seventeen million people earn, on average, the same income they did in 1980, while the typical income for the top one percent has nearly tripled. (newyorker.com)
- In the first ten months of 2016, foreigners bought nearly fourteen hundred square miles of land in New Zealand, more than quadruple what they bought in the same period the previous year, according to the government. (newyorker.com)
- A gravel bike was the clear winner, receiving more than 90 percent of the votes. Background: This summer, we surveyed our readers about what they’d shove into a backpack if they were caught unprepared for the collapse of society. (inverse.com)
External Links
How To
How to keep food alive in a survival situation
Drying food is the best way to preserve it in an emergency situation. Drying food makes them last longer by removing moisture. It also helps to reduce the growth of bacteria.
Dried fruits are great for snacking on during an emergency because they don't require any preparation. Dried fruits are easy to transport and can be eaten as much as you like without worrying about weight gain.
While you can dry fruit at your home using a dehydrator and a sun oven, it's much more convenient to do so in a commercial setting. To dry any type of food, you could use a sun oven, such as meats, fish, vegetables and grains.
Food preservation is best done by making sure it is airtight. This will prevent oxygen from getting into the container and spoiling food. The container can be sealed tight enough to prevent oxygen from entering the food.
If you do decide to add preservatives, try adding salt first. Salt prevents mold growth. Then, follow that with vinegar. Vinegar is a good way to kill harmful bacteria and stop mold growth.
To get started, you'll need to cut up your food into small pieces. You can either use scissors or a knife. Be sure to pack everything securely so no air can get inside.
Next, place the food in a bag. Place the food inside a plastic bag. Keep it warm until it dries fully.
After the food is dried, seal it in a container. It is important not to let food contact other things.